
The Records of Hill End Hospital
Conservation of the Records
By Gary Moyle, Archivist at Hertfordshire Archives and Local Studies


Part of the Out of Sight Out of Mind project funding was allocated to the conservation of Hill End archives, which are stored at Hertfordshire Archives and Local Studies. This was carried out by trainee conservator Haley McHaffie, under the guidance of conservator Jeff Cargill.
The following is Haley’s report on the processes and techniques she used to repair the most damaged items in the collection.
CONSERVATION REPORT by Haley McHaffie
The aim of this project was to conserve significant records of the Hill End Hospital that are held at The Hertfordshire Archives and Local Studies, County Hall, Hertford. It has been part of an initiative to highlight the importance of preserving Hill End’s historical significance to local people throughout the county.
Conservation priorities
The first stage of this project was to examine the collection and identify items for immediate conservation work. There were a number of items that needed our attention, however not all could benefit from full conservation treatment so items needed to be prioritised according to their physical state.
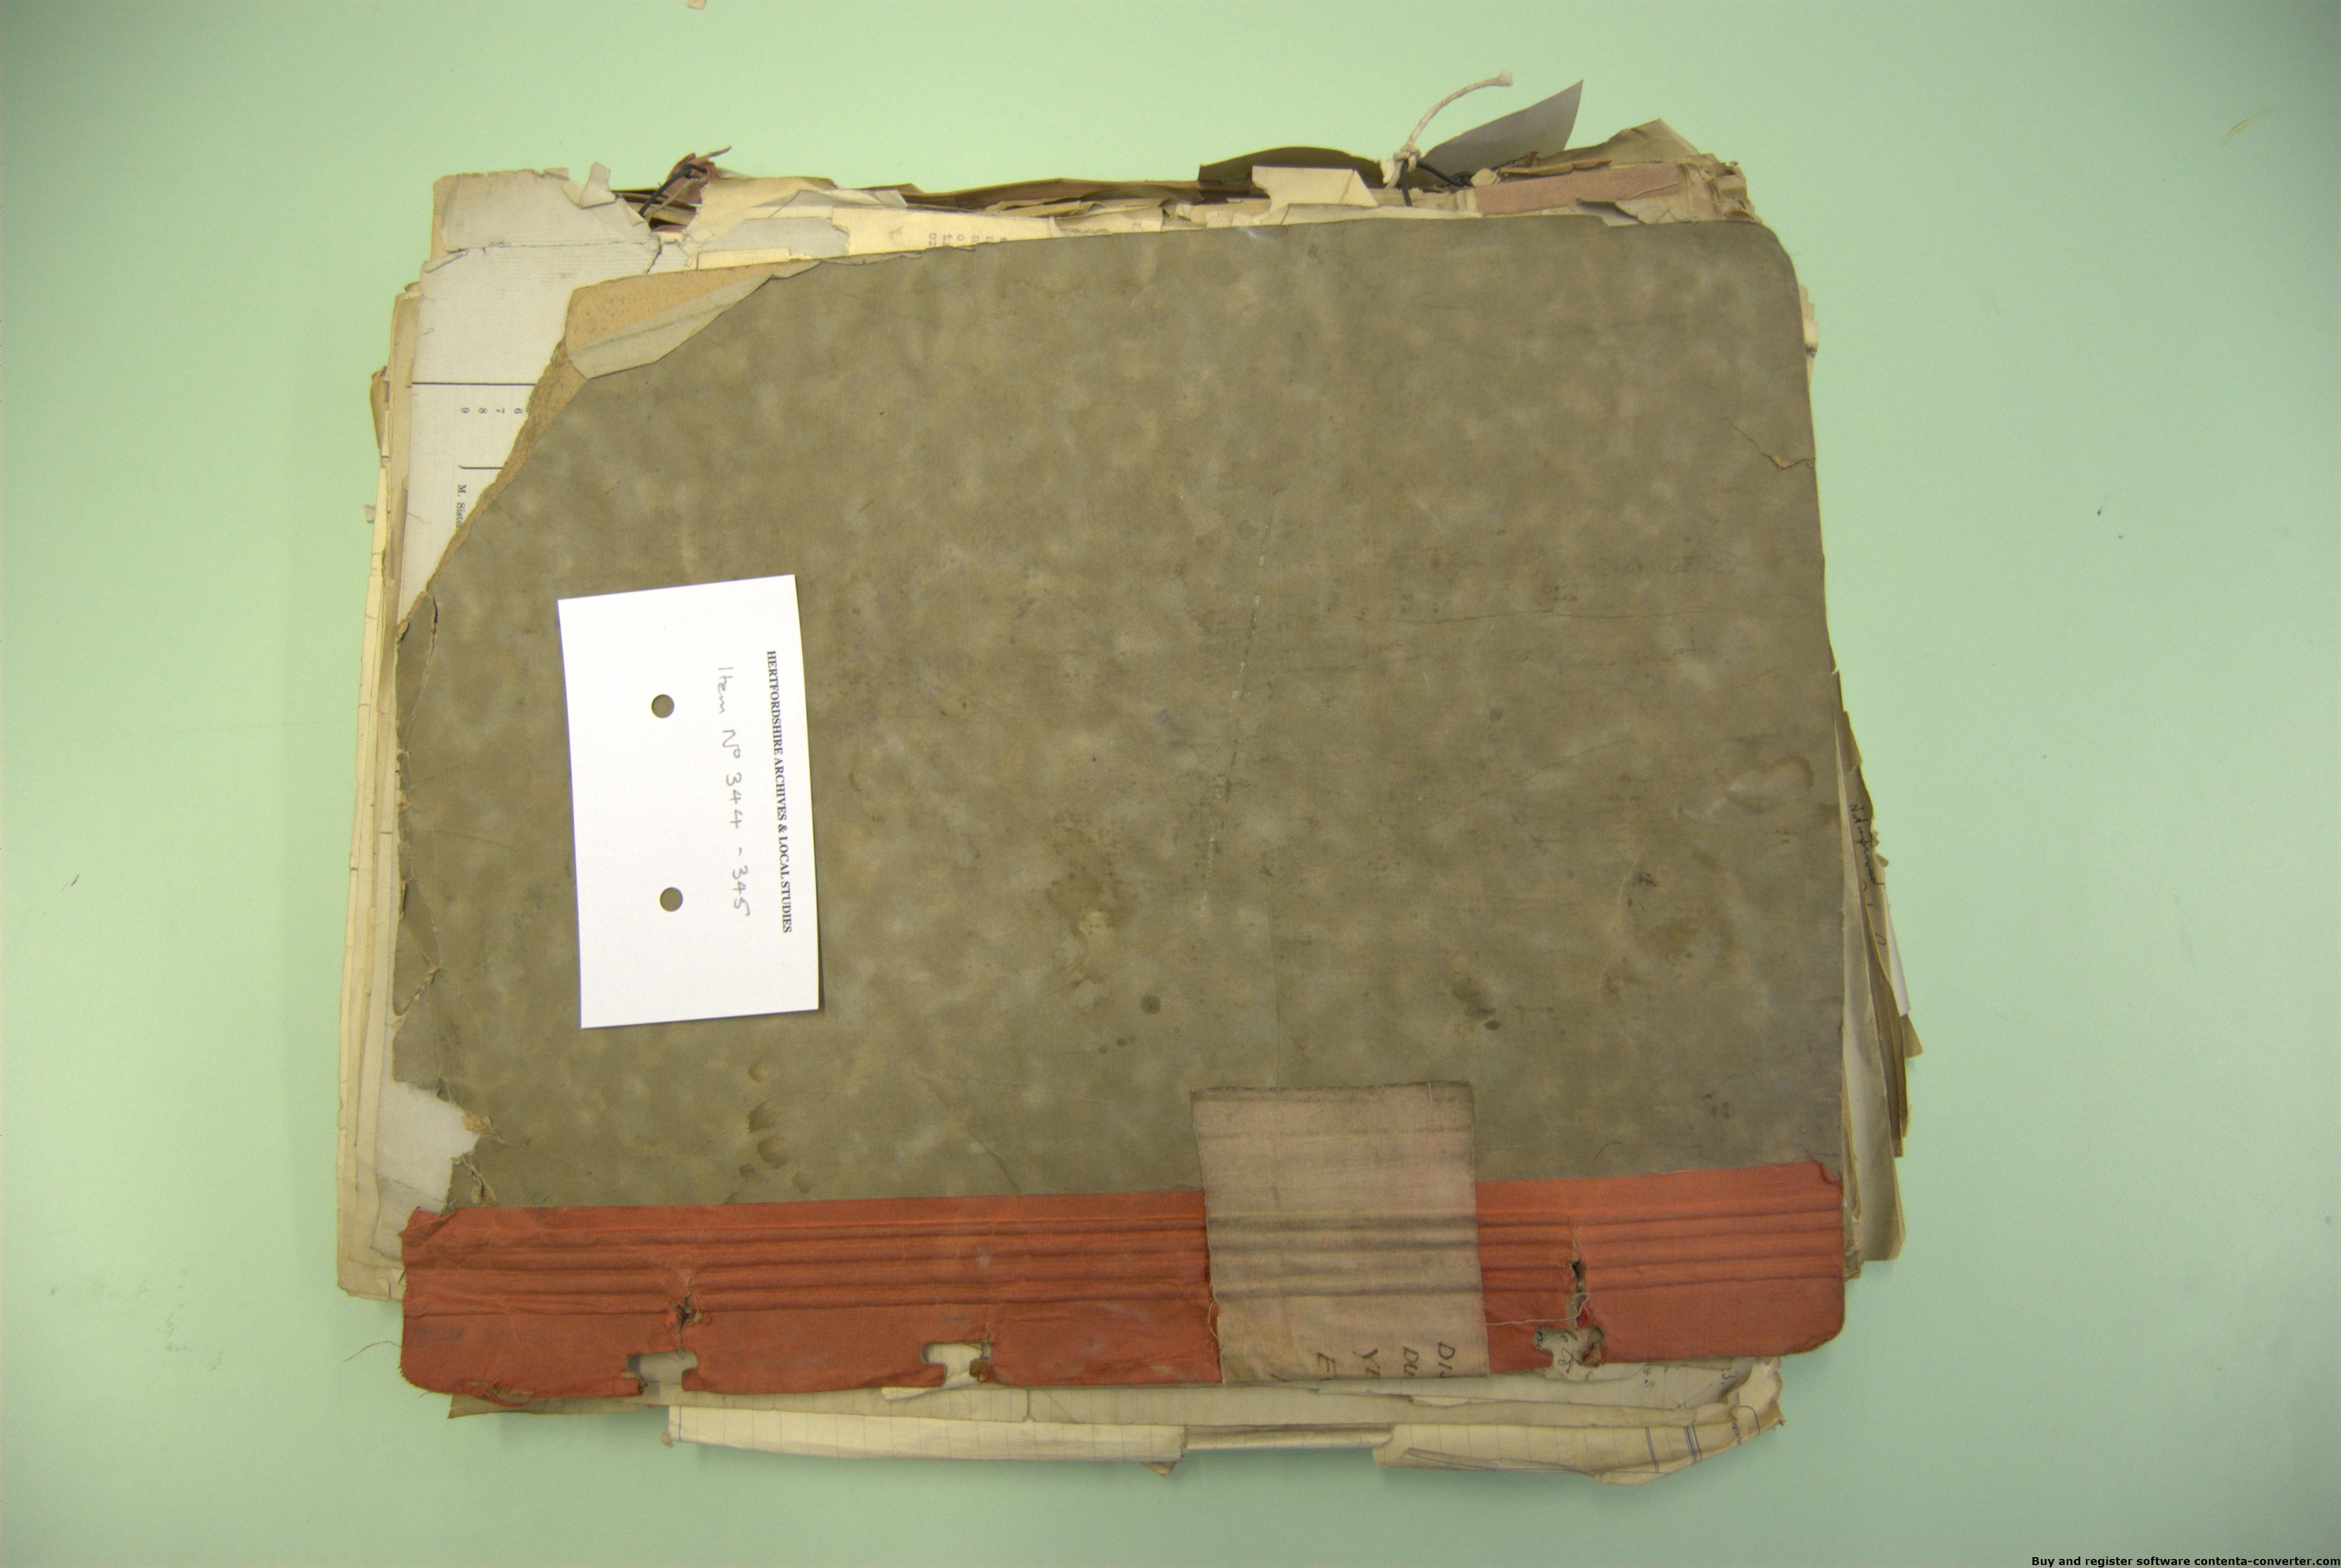
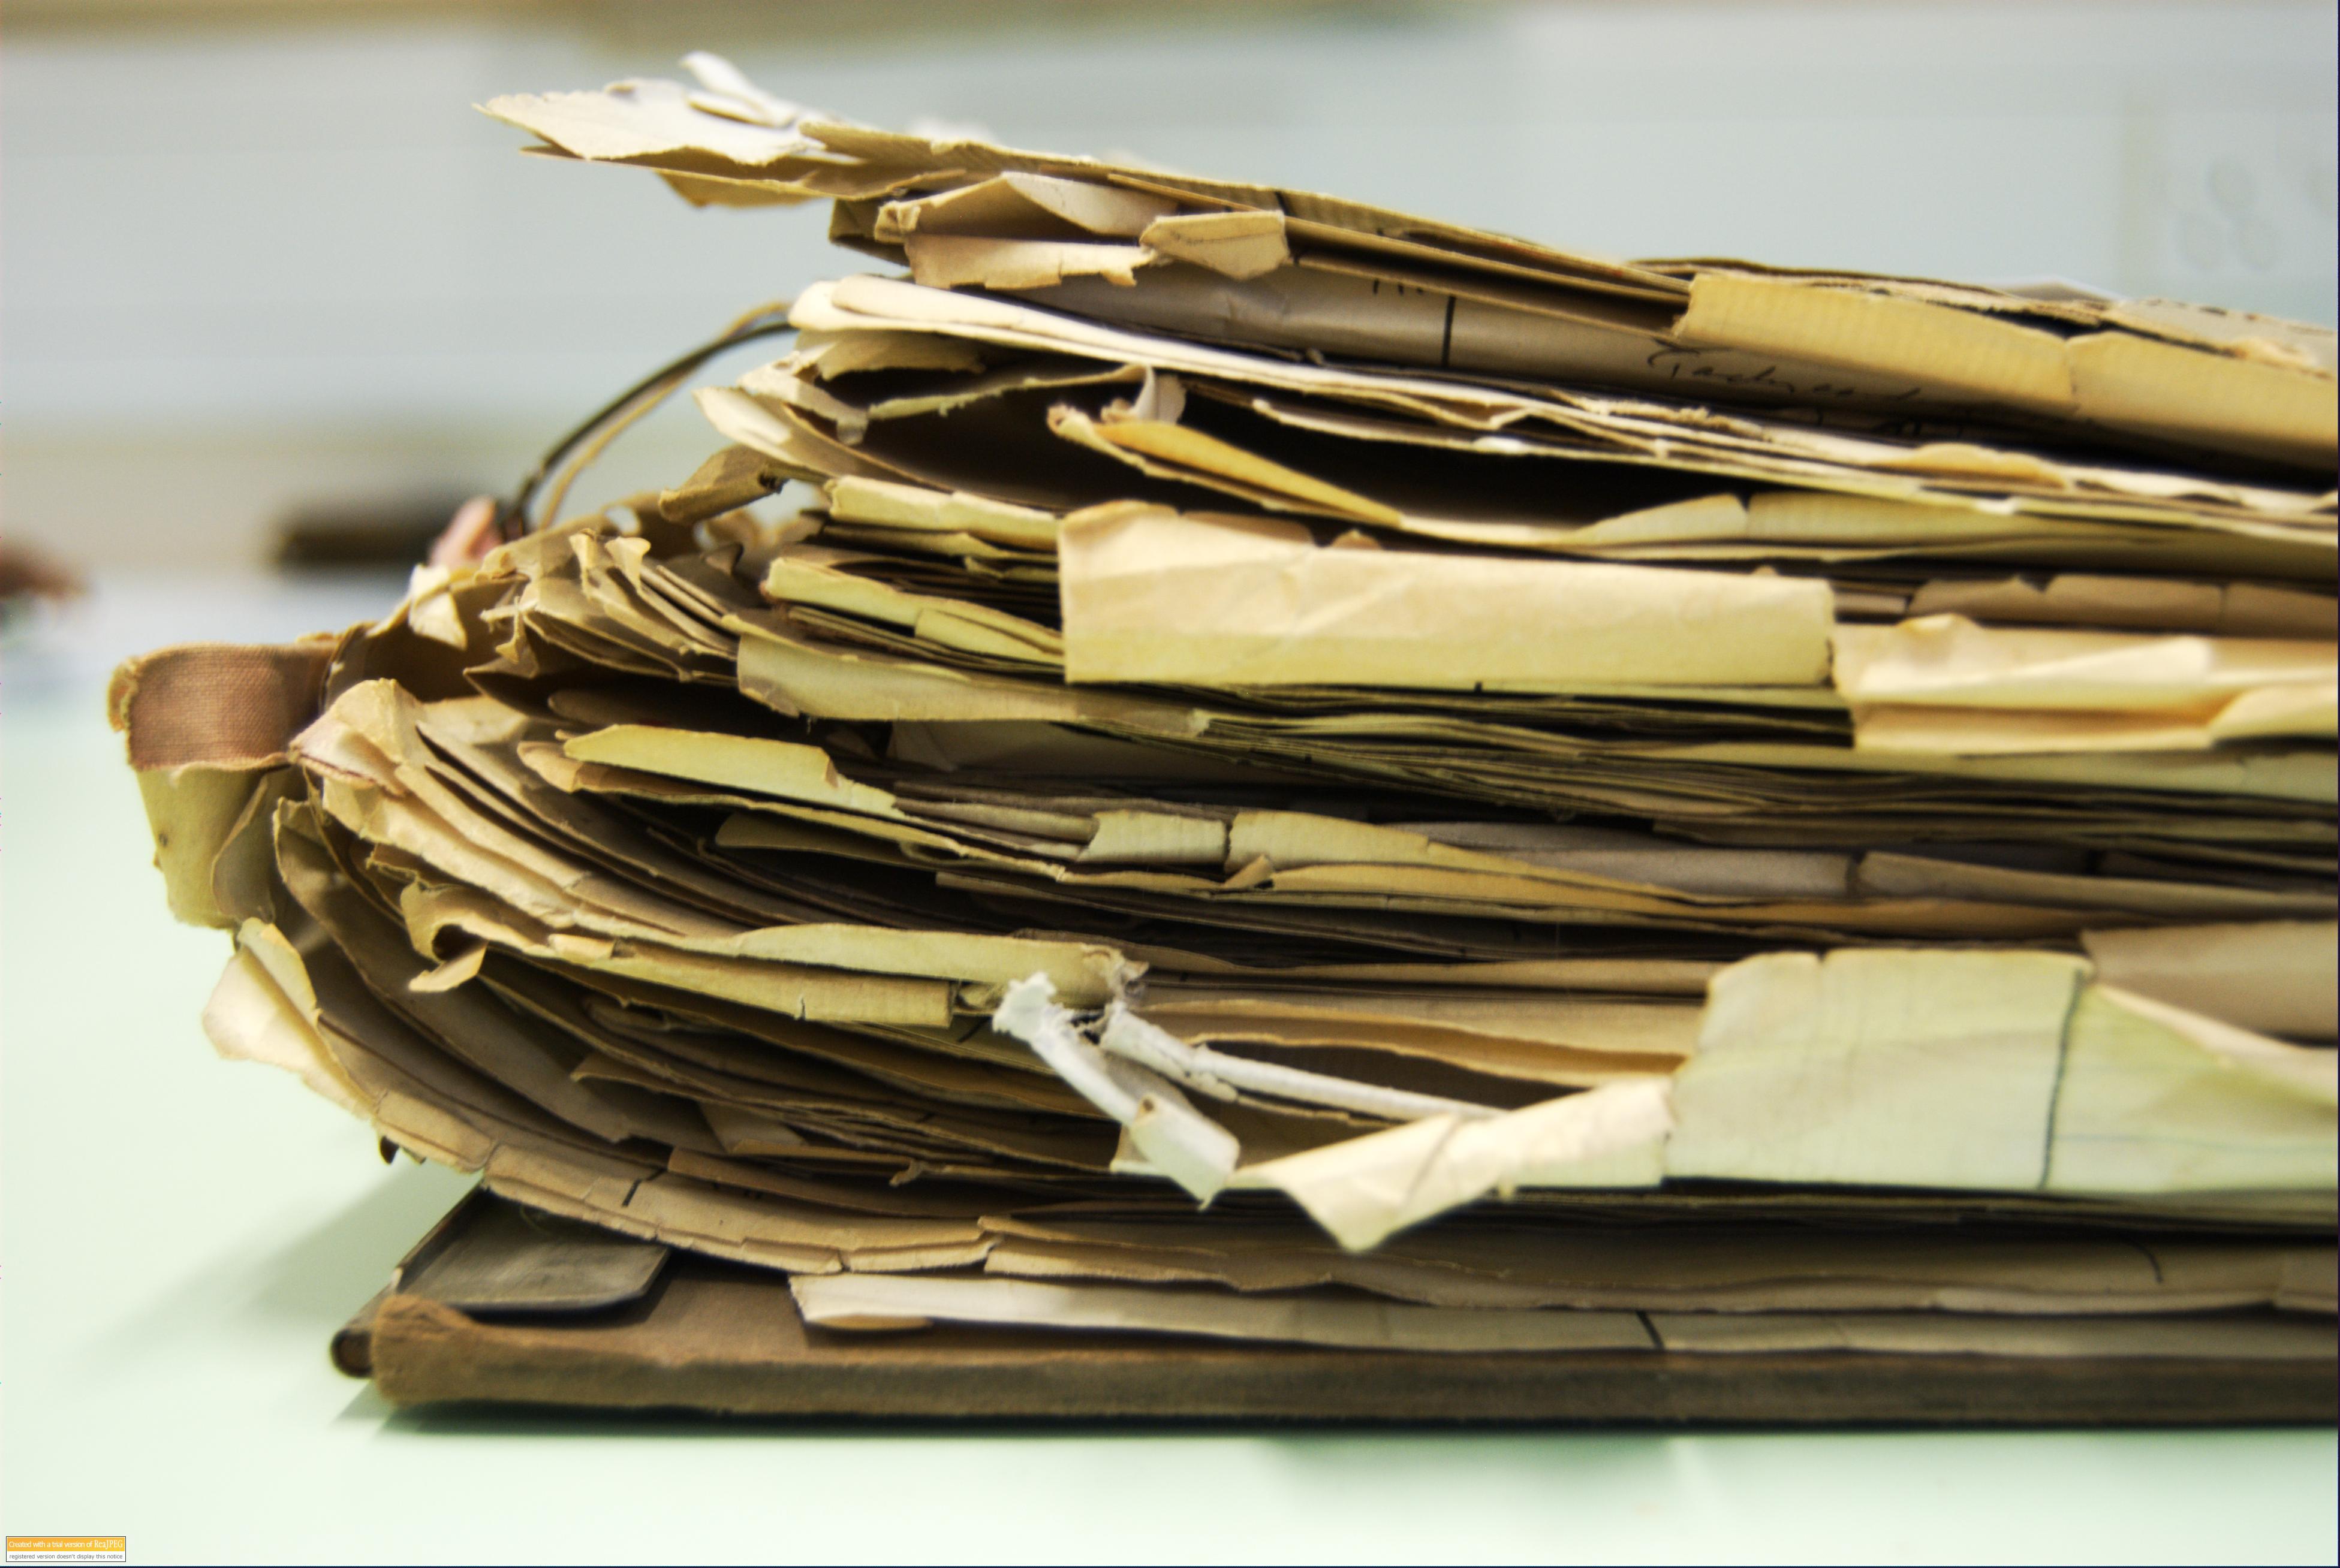
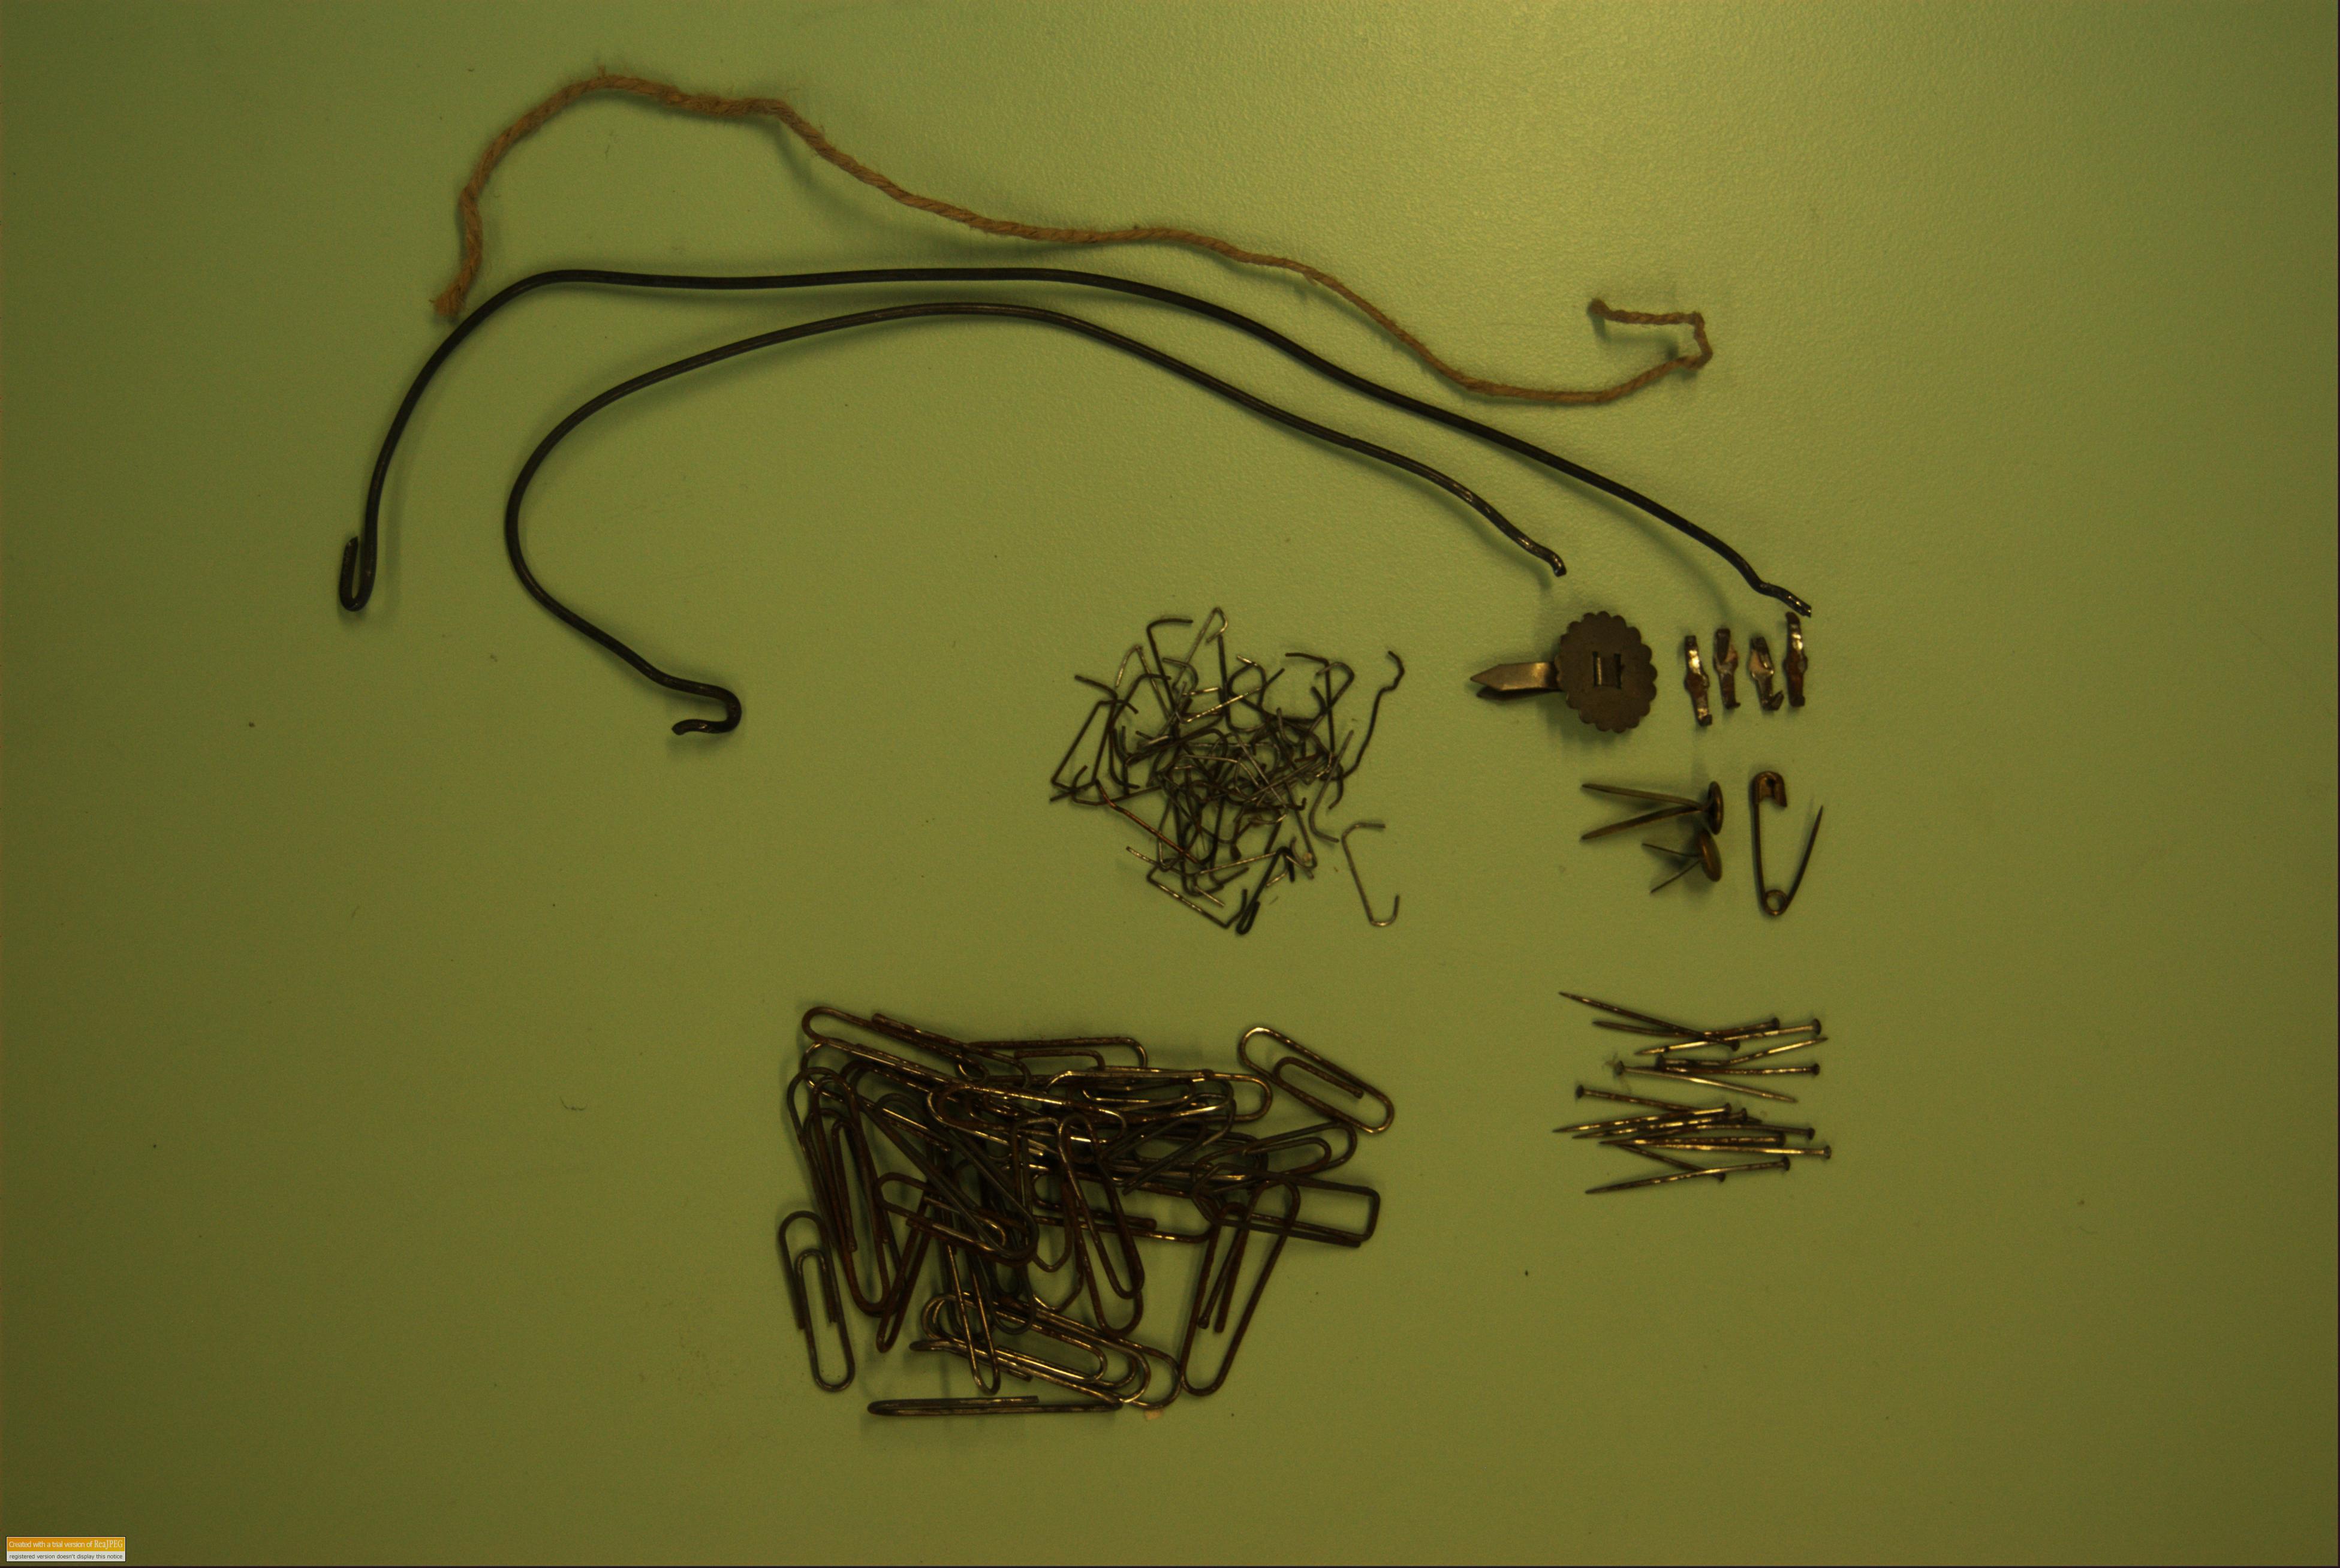
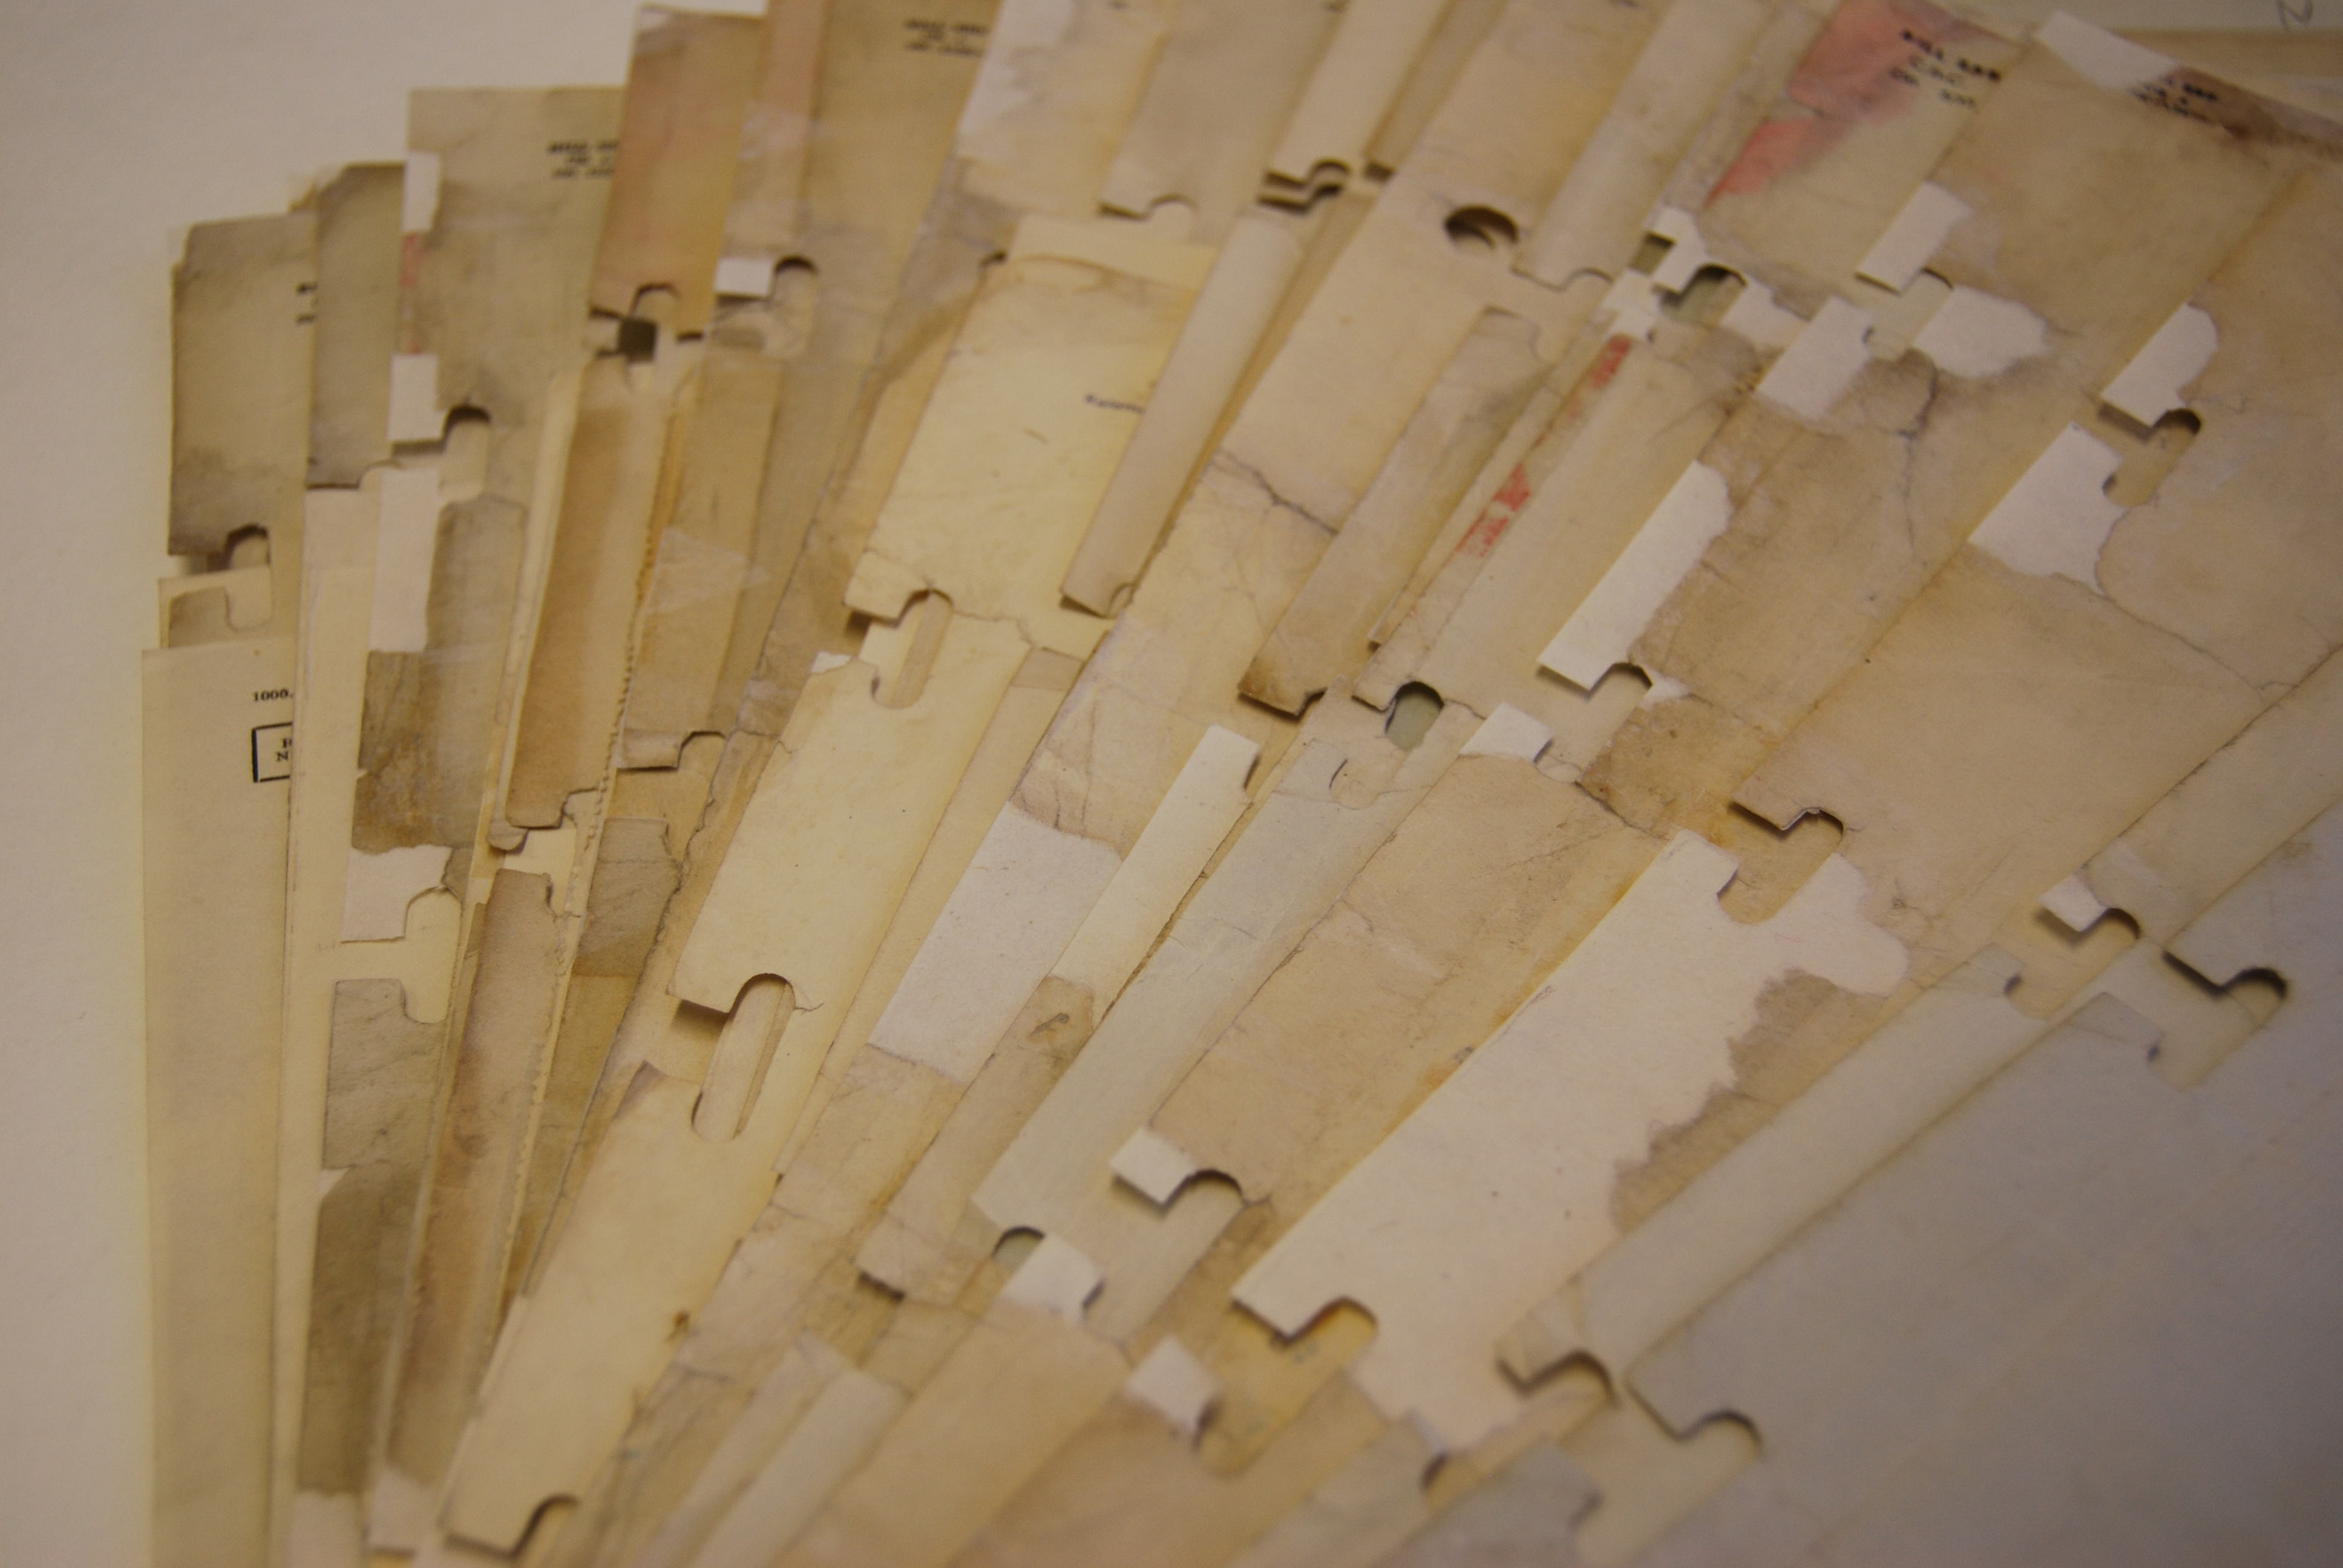
It was clear from the extremely poor condition of the female death and discharges register that this was to take priority. It had no protective cover, pages were exposed to atmospheric conditions, some were adhered together using medical tape, and all pages were bound together with two pieces of metal wire at either end.
It was clear that handling would cause further damage, so it was decided that this item would take priority.
Deciding on appropriate treatment
A treatment proposal was discussed with myself and head conservator Jeff Cargill. Deliberations of its repair and long term care were considered carefully.
Maintaining the item’s historical significance within the collection while giving it sufficient protection was our objective.
This meant that each page would be removed from the metal fastening and numbered carefully in pencil on the bottom right hand corner. This ensured that the documents would be kept within their original context. Other treatments included:
- Surface cleaning with a dry chemical sponge and a soft brush
- Folds and creases flattened using water pen and pressing boards
- Removal of medical tape and other metal fastenings
- Any pages adhered together would be carefully separated using the humidification chamber
- Tears repaired using spider tissue and wheat starch paste
Missing areas would be in-filled using a Japanese paper
Metal attachments
During the first stages of repair other metal attachments were discovered within the item, including a metal fastening located along the back cover . It was decided to keep the front and back cover for historical reasons and remove any other secondary material.
Surface cleaning
Once all the pages had been removed and numbered surface cleaning began.
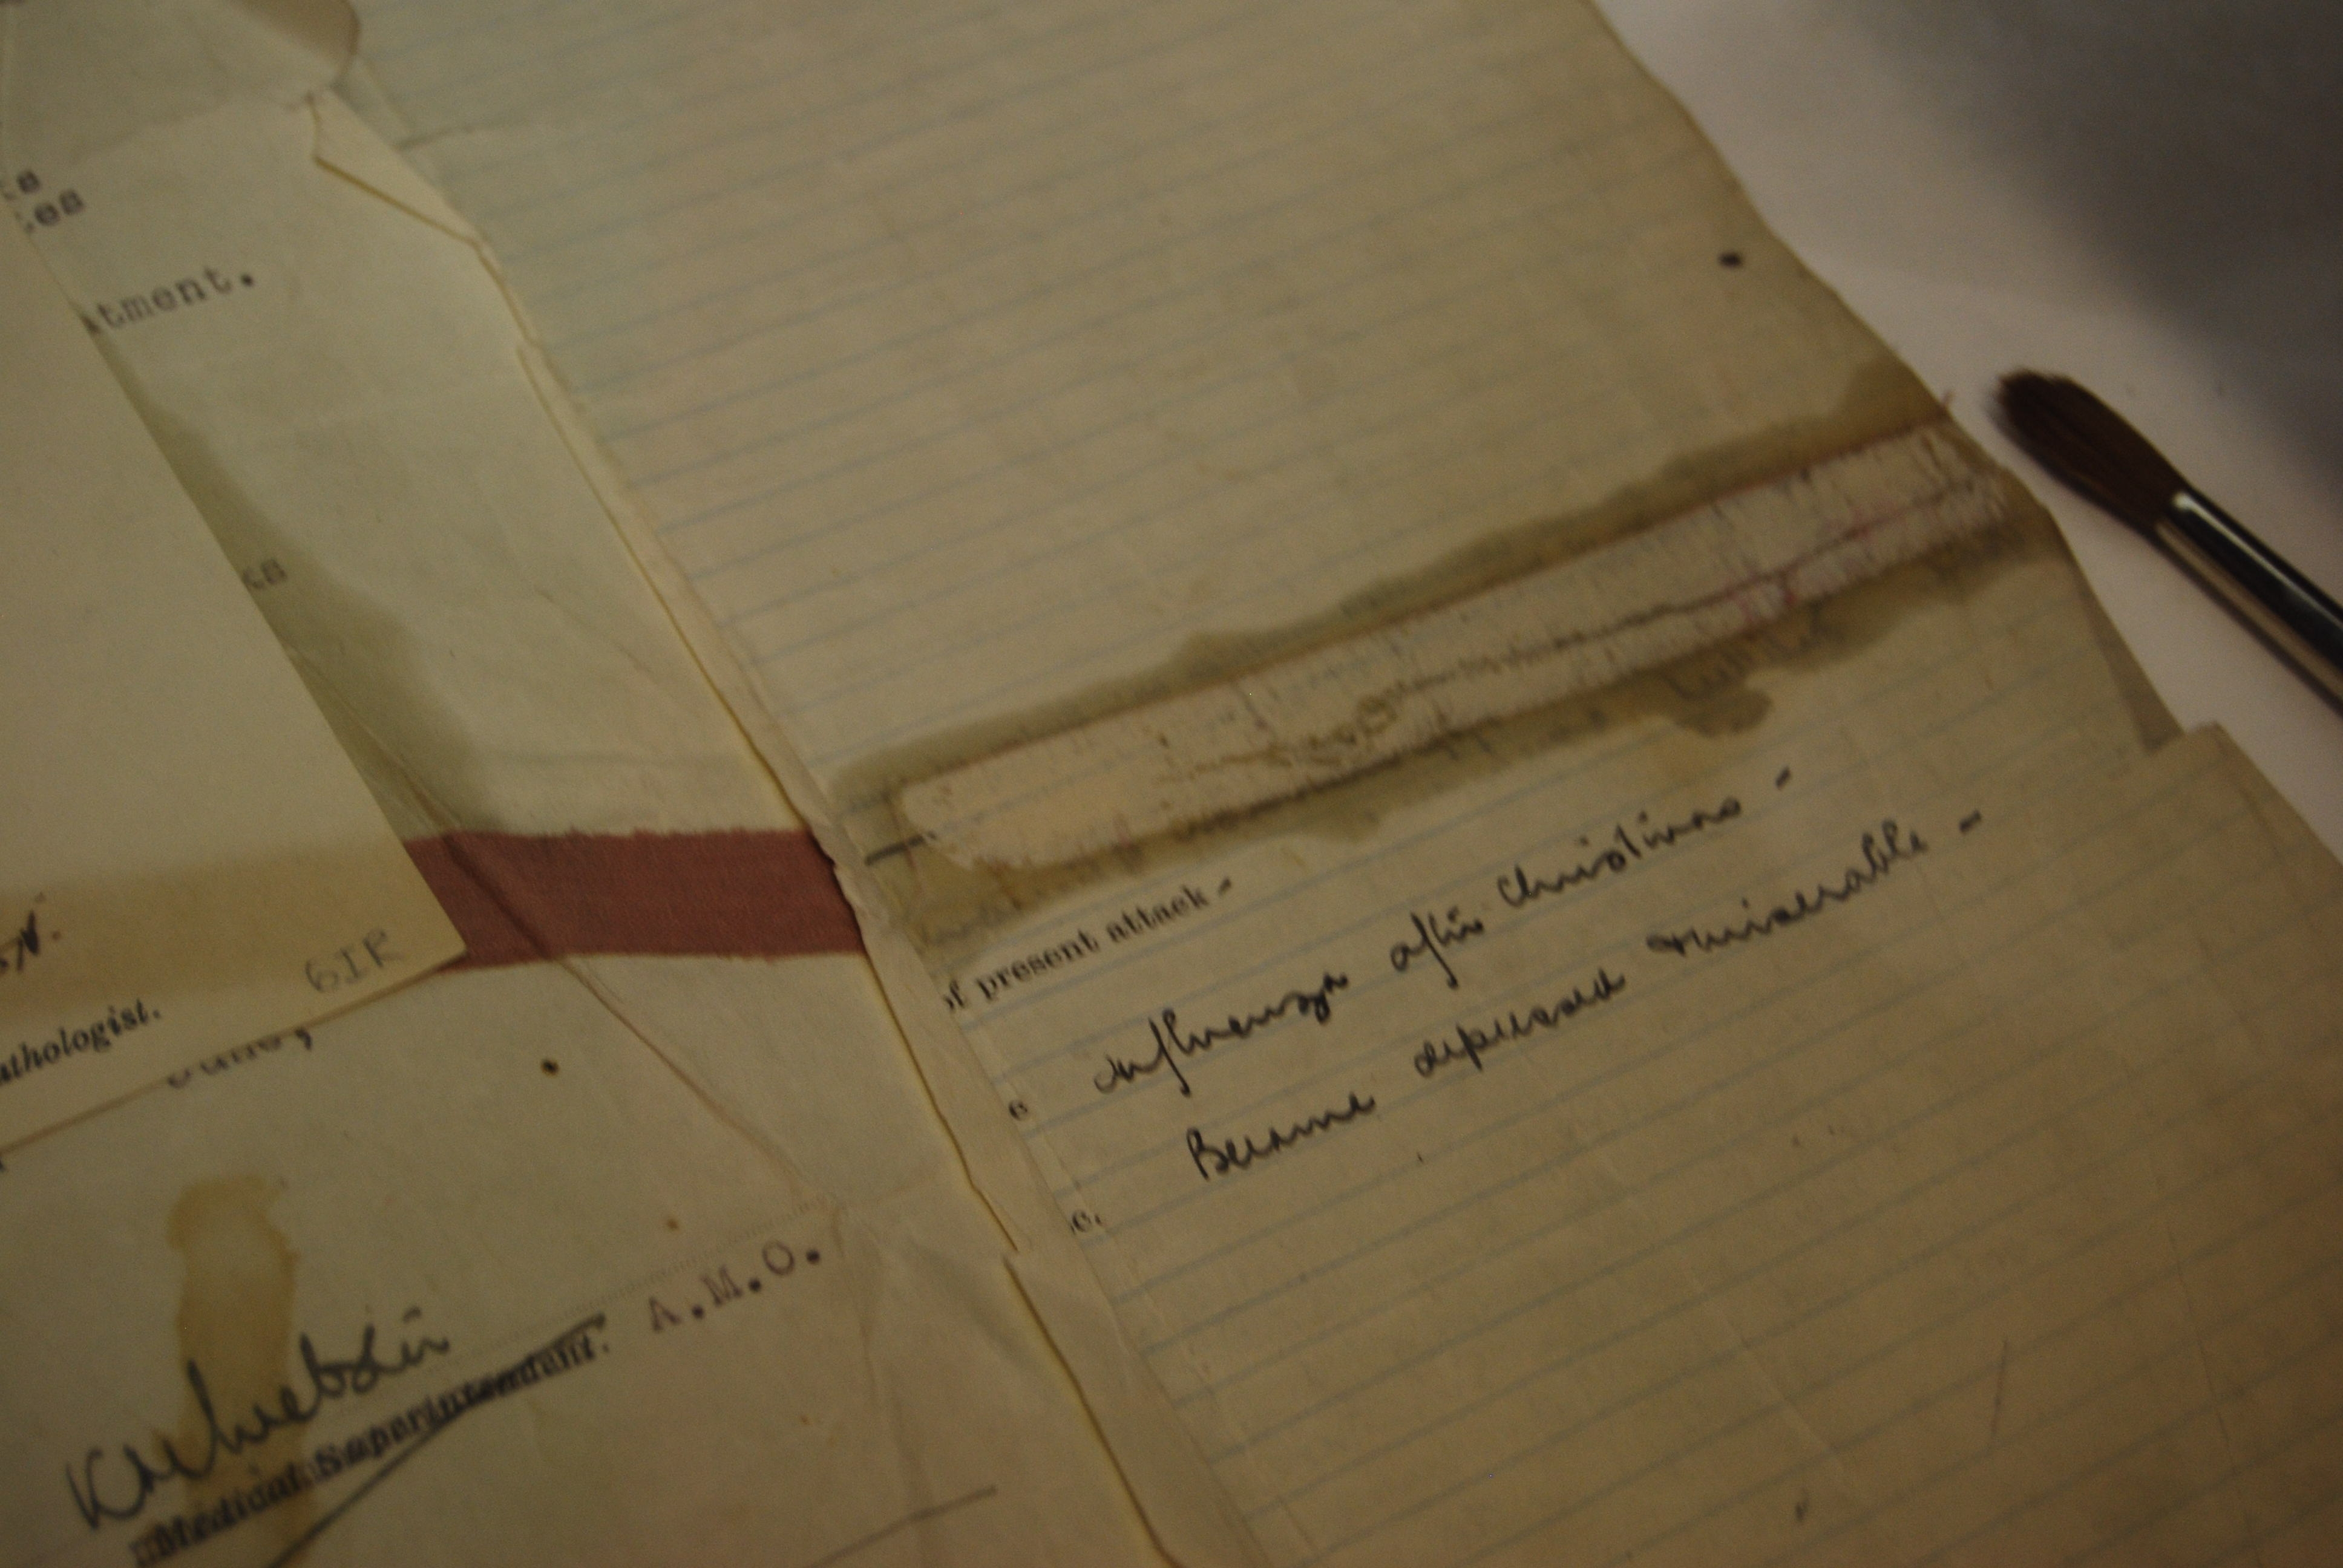
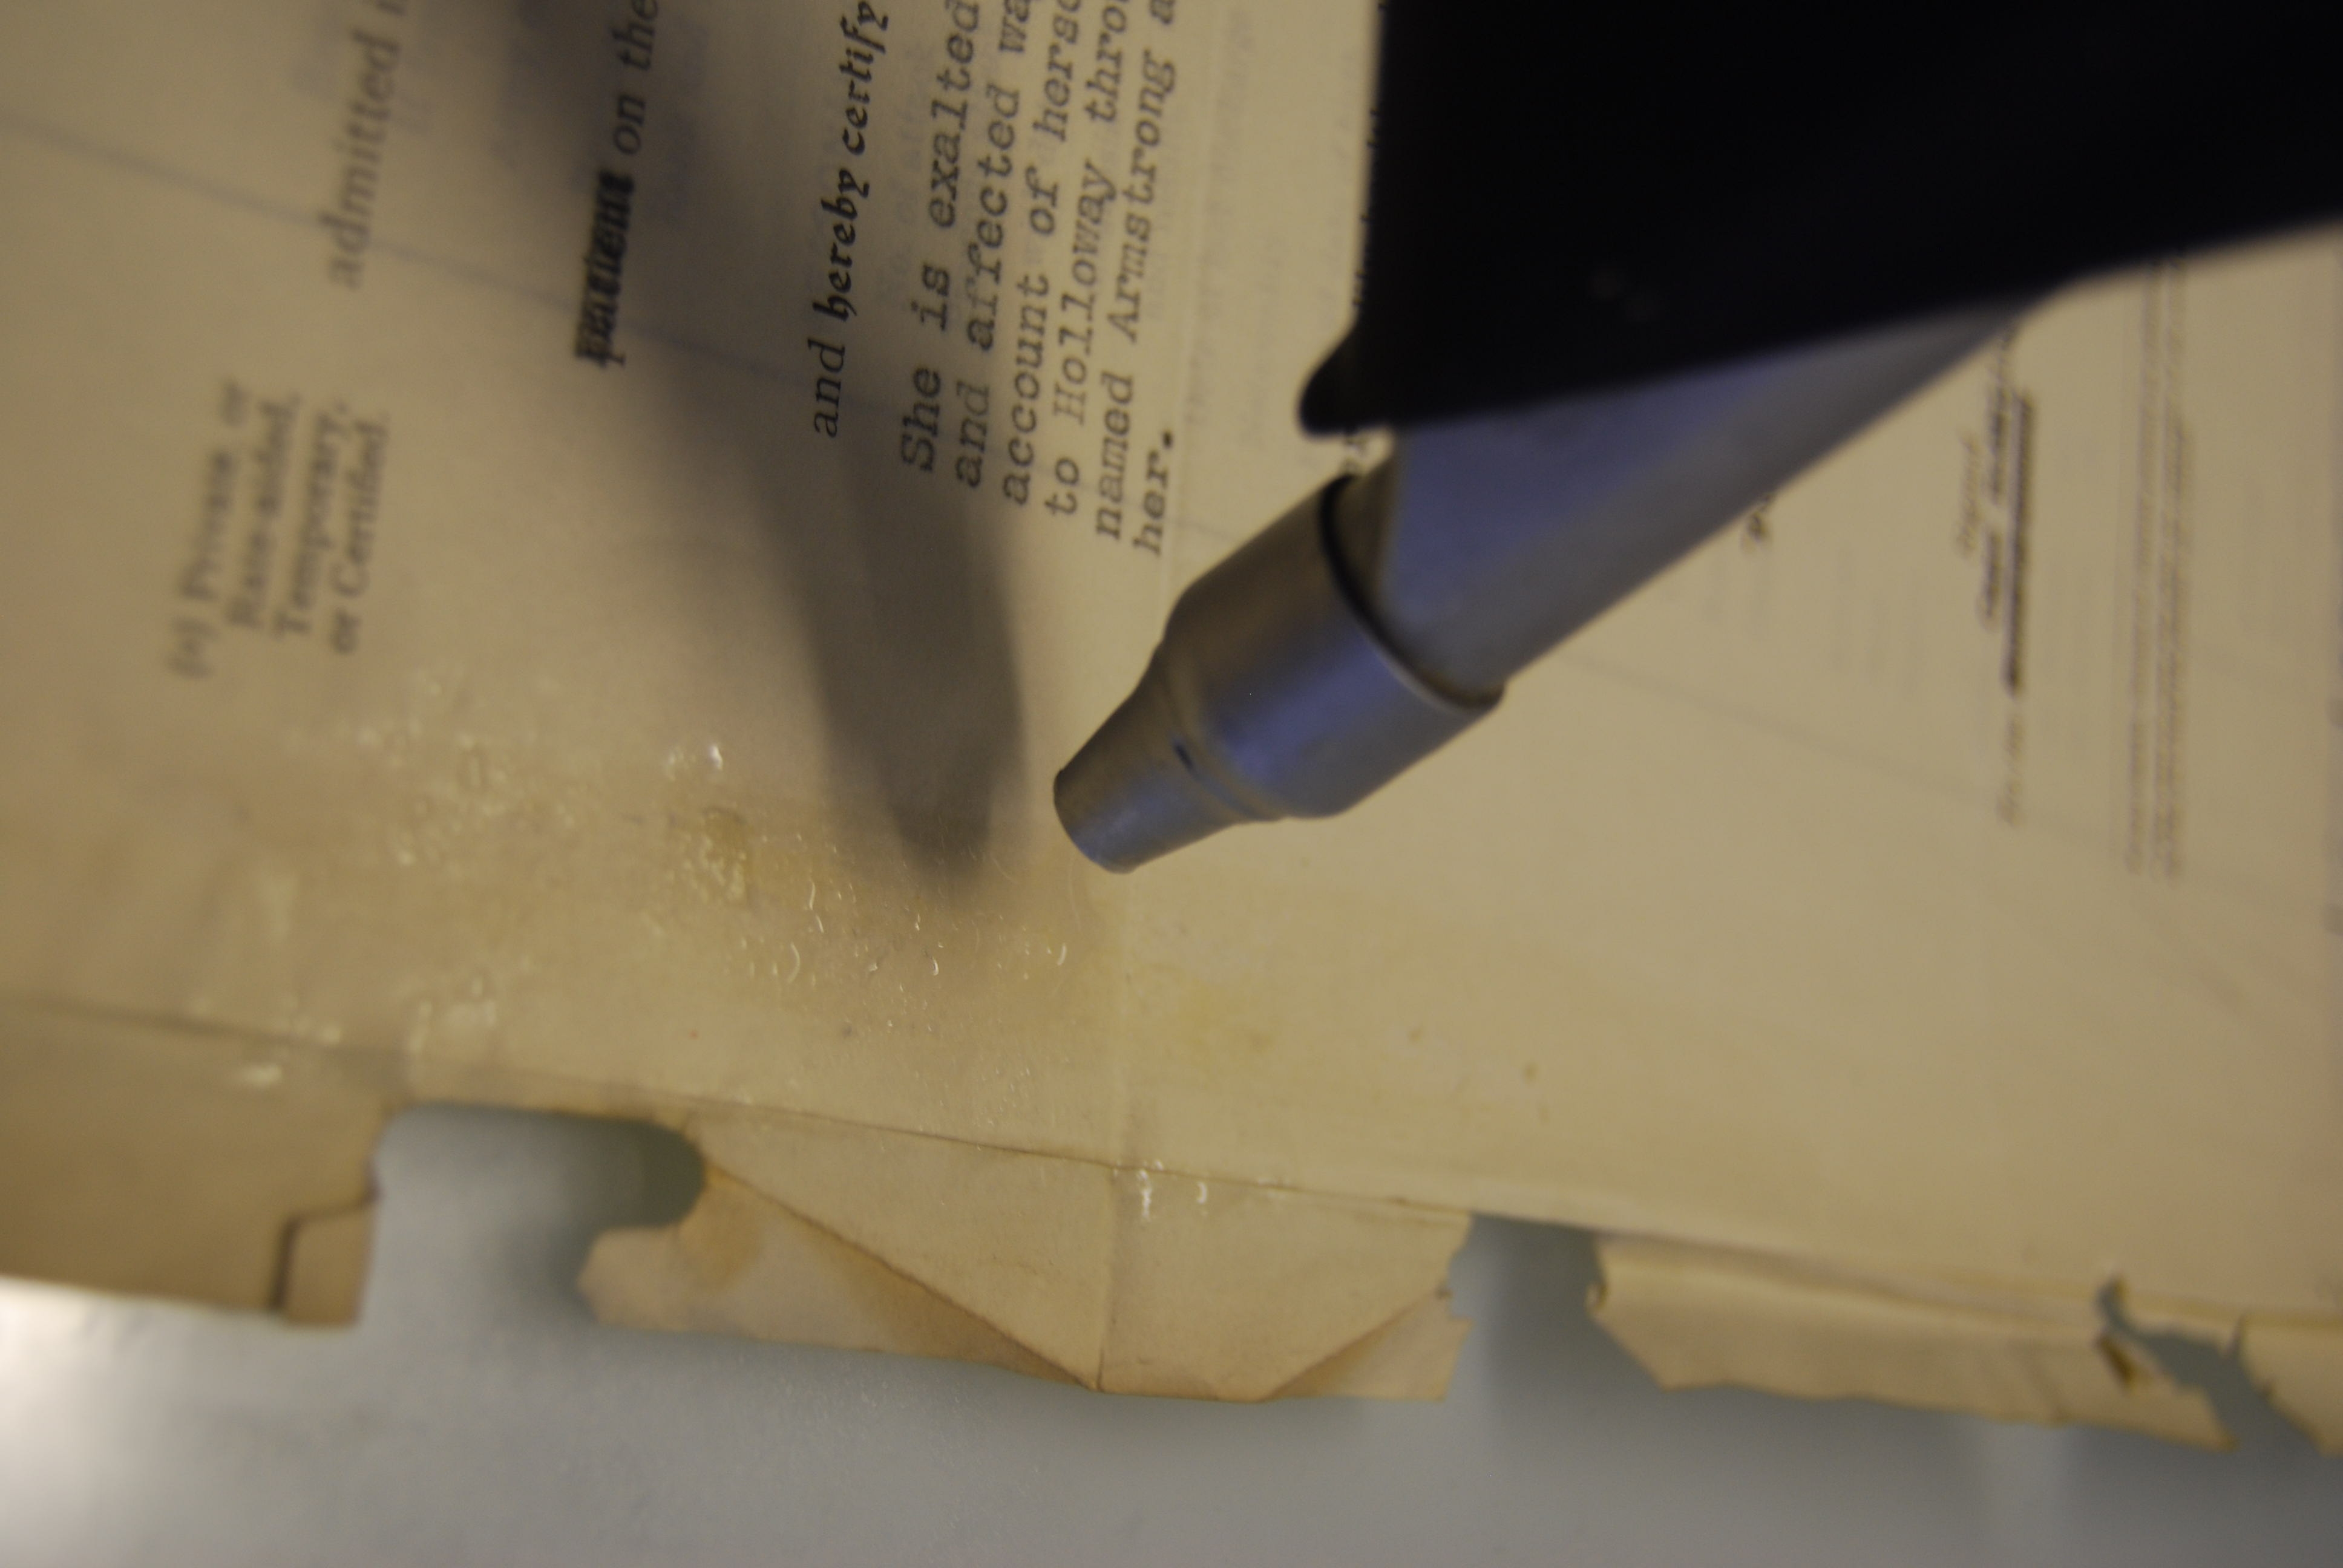
Fugitive tests revealed that the majority of inks would run in the presence of water, indicating that we were unable to proceed with any washing treatments. In this case, surface cleaning became extremely important in removing as much surface dirt as we could. Each page was cleaned thoroughly on the verso and recto using a dry chemical sponge and a plastic eraser for stubborn marks along creases. This process took a week to complete.
Removing medical tape
The second stage of repair was to remove the medical tape. It had done a lot of damage to the item. Pages that were in direct contact with it had been stained and some areas were left with a sticky residue from the adhesive.
The tape had two functions:
- To hold small bundles together
- To repair large tears along the middle of the document.
A number of solvents were applied to the tape in the fume cupboard to see if they would remove it without damaging the fibres of the paper. Petroleum spirit, white spirit, xylene, and acetone were experimented with. In this case xylene appeared most effective. It was applied to the tape and left to soak in for a few minutes before it was peeled away carefully using a spatula.
Separating the pages
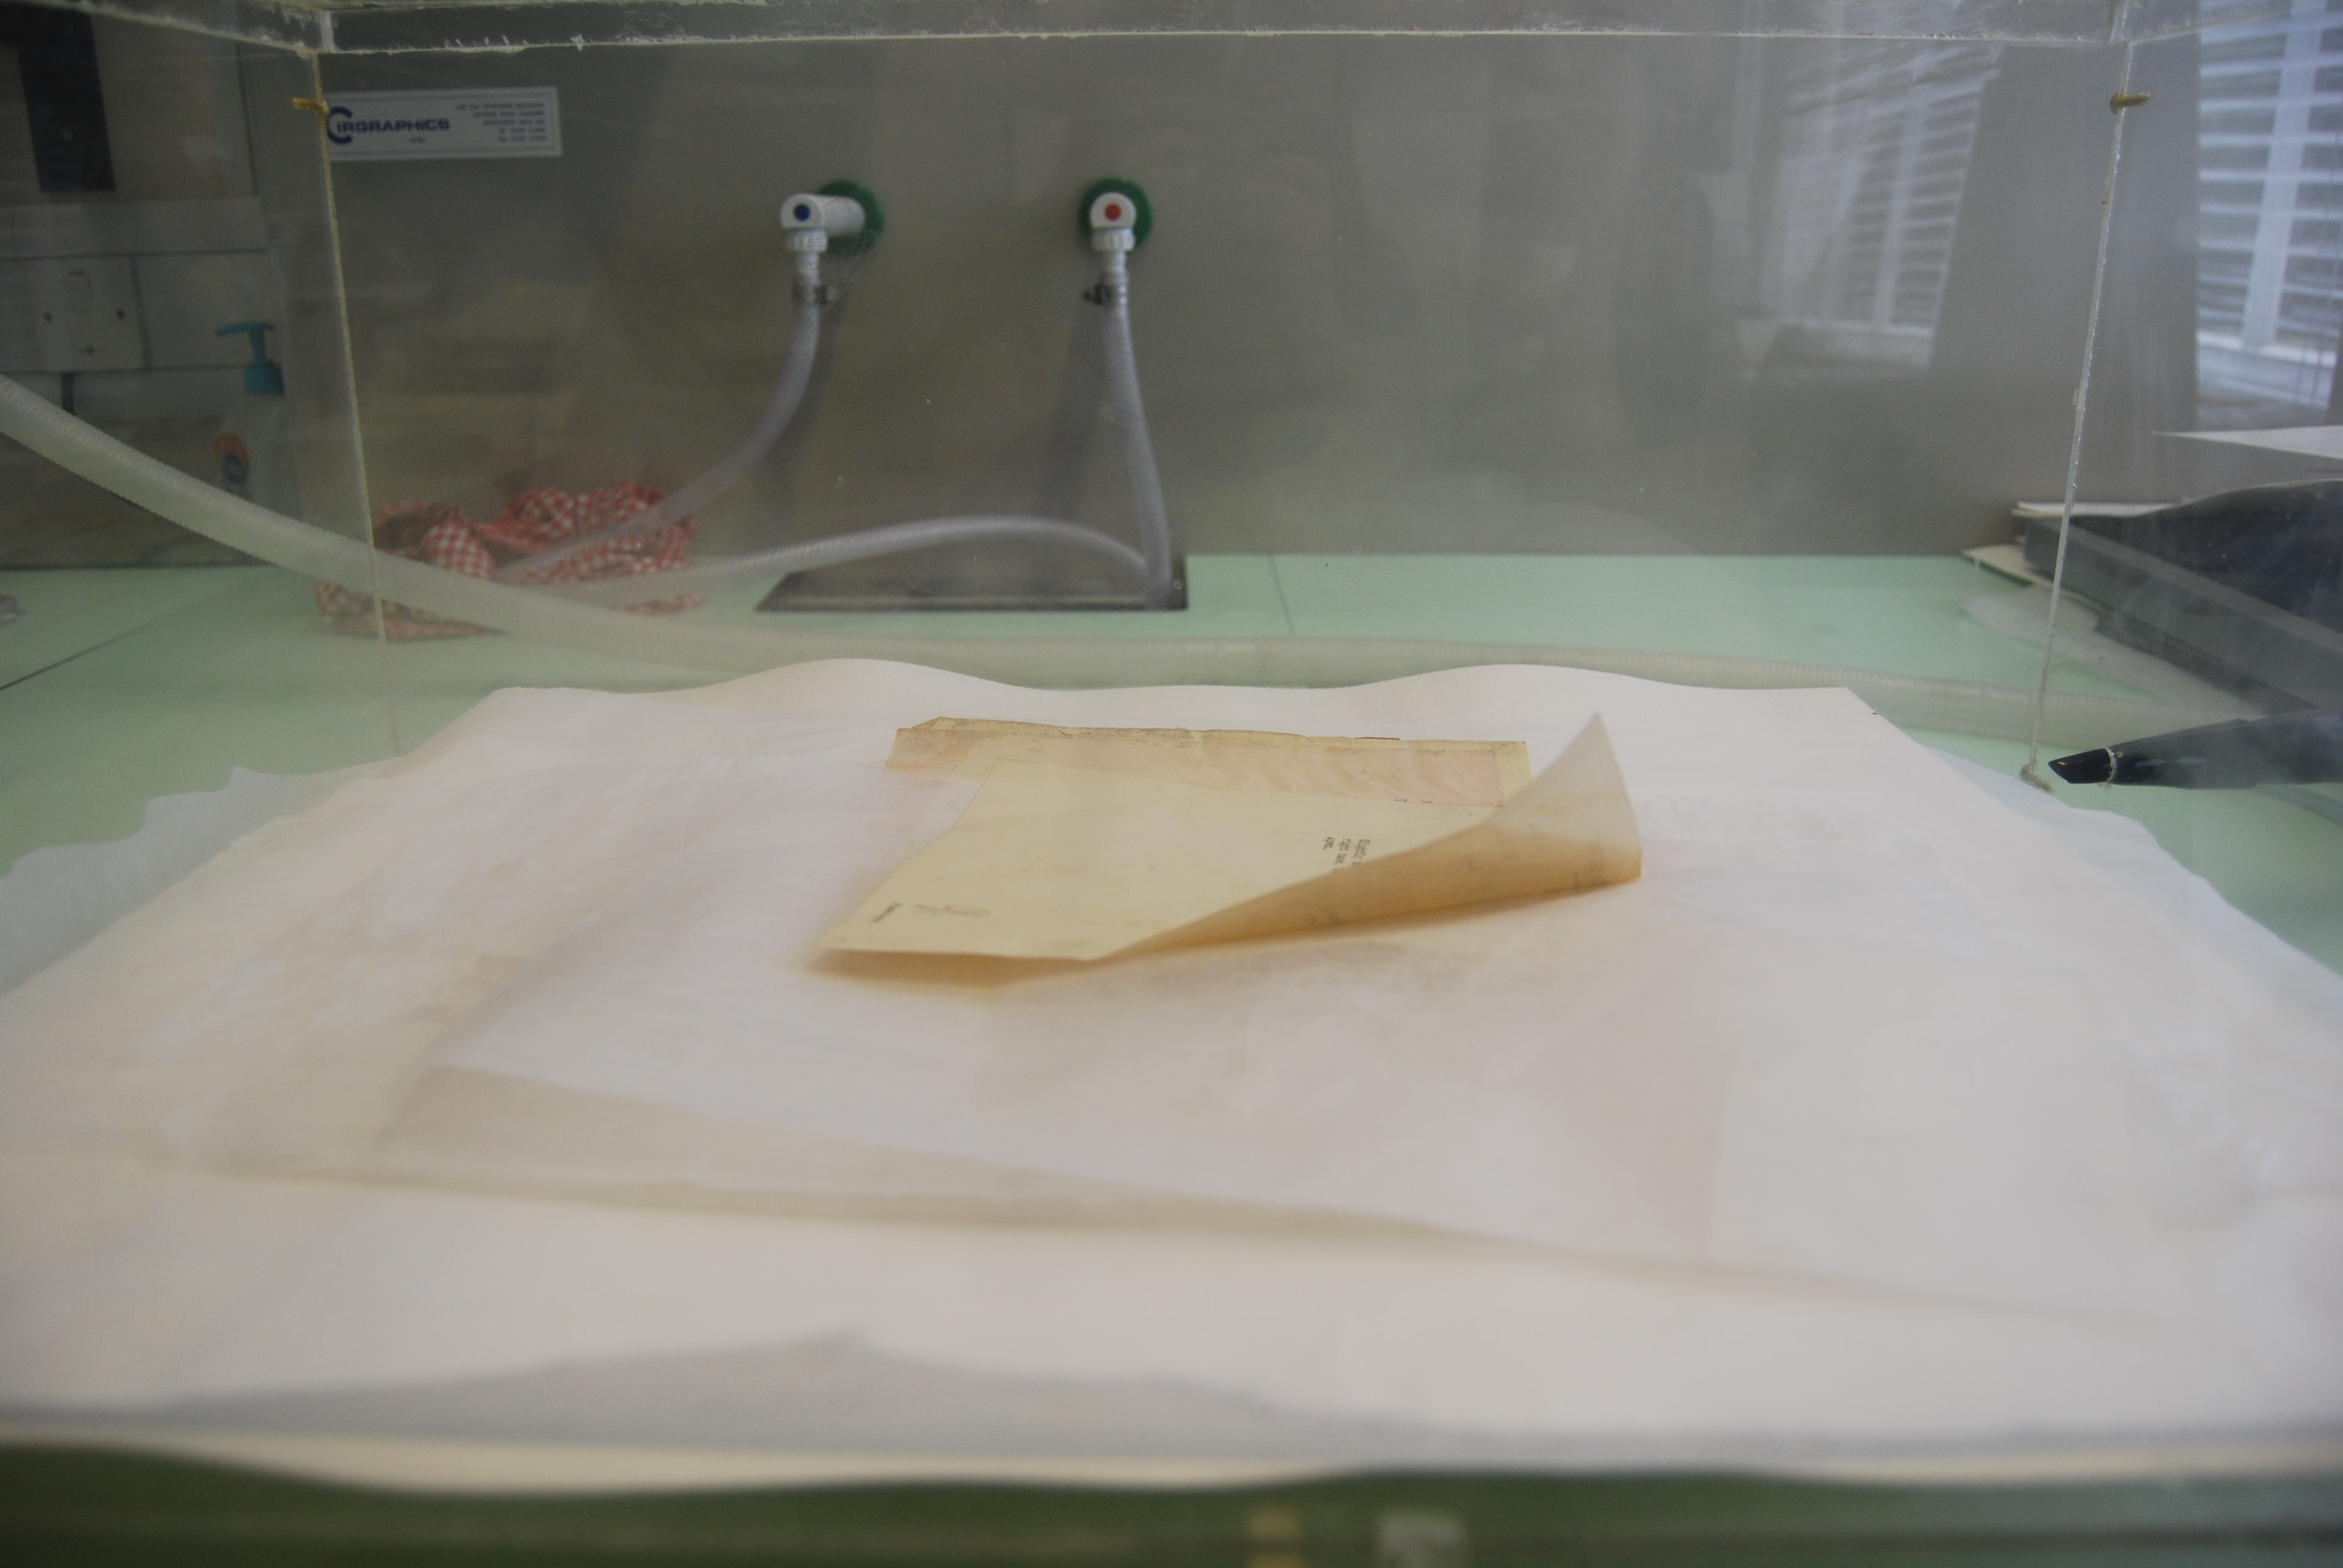
The third stage of repair was to separate pages that were fixed together with adhesive.
Each document was placed in the humidifying chamber for 10-15 minutes. This procedure had two main functions
- It allowed the water vapour to relax the fibres of the paper. Helping to reduce cockling, creases and folds.
- The water vapour swelled the adhesive, making it easier to remove with a spatula.
However, this process took far too long. In some instances documents were put in the chamber for more than 20 minutes at a time. A faster and more direct approach needed to be taken.
It was decided to revert to the steam pencil. This process gives the user more control. It also allows the hot steam to penetrate the adhesive more quickly and effectively. It was applied directly over the area and left to penetrate the adhesive for a couple of minutes. A spatula was used to gently separate the pages.
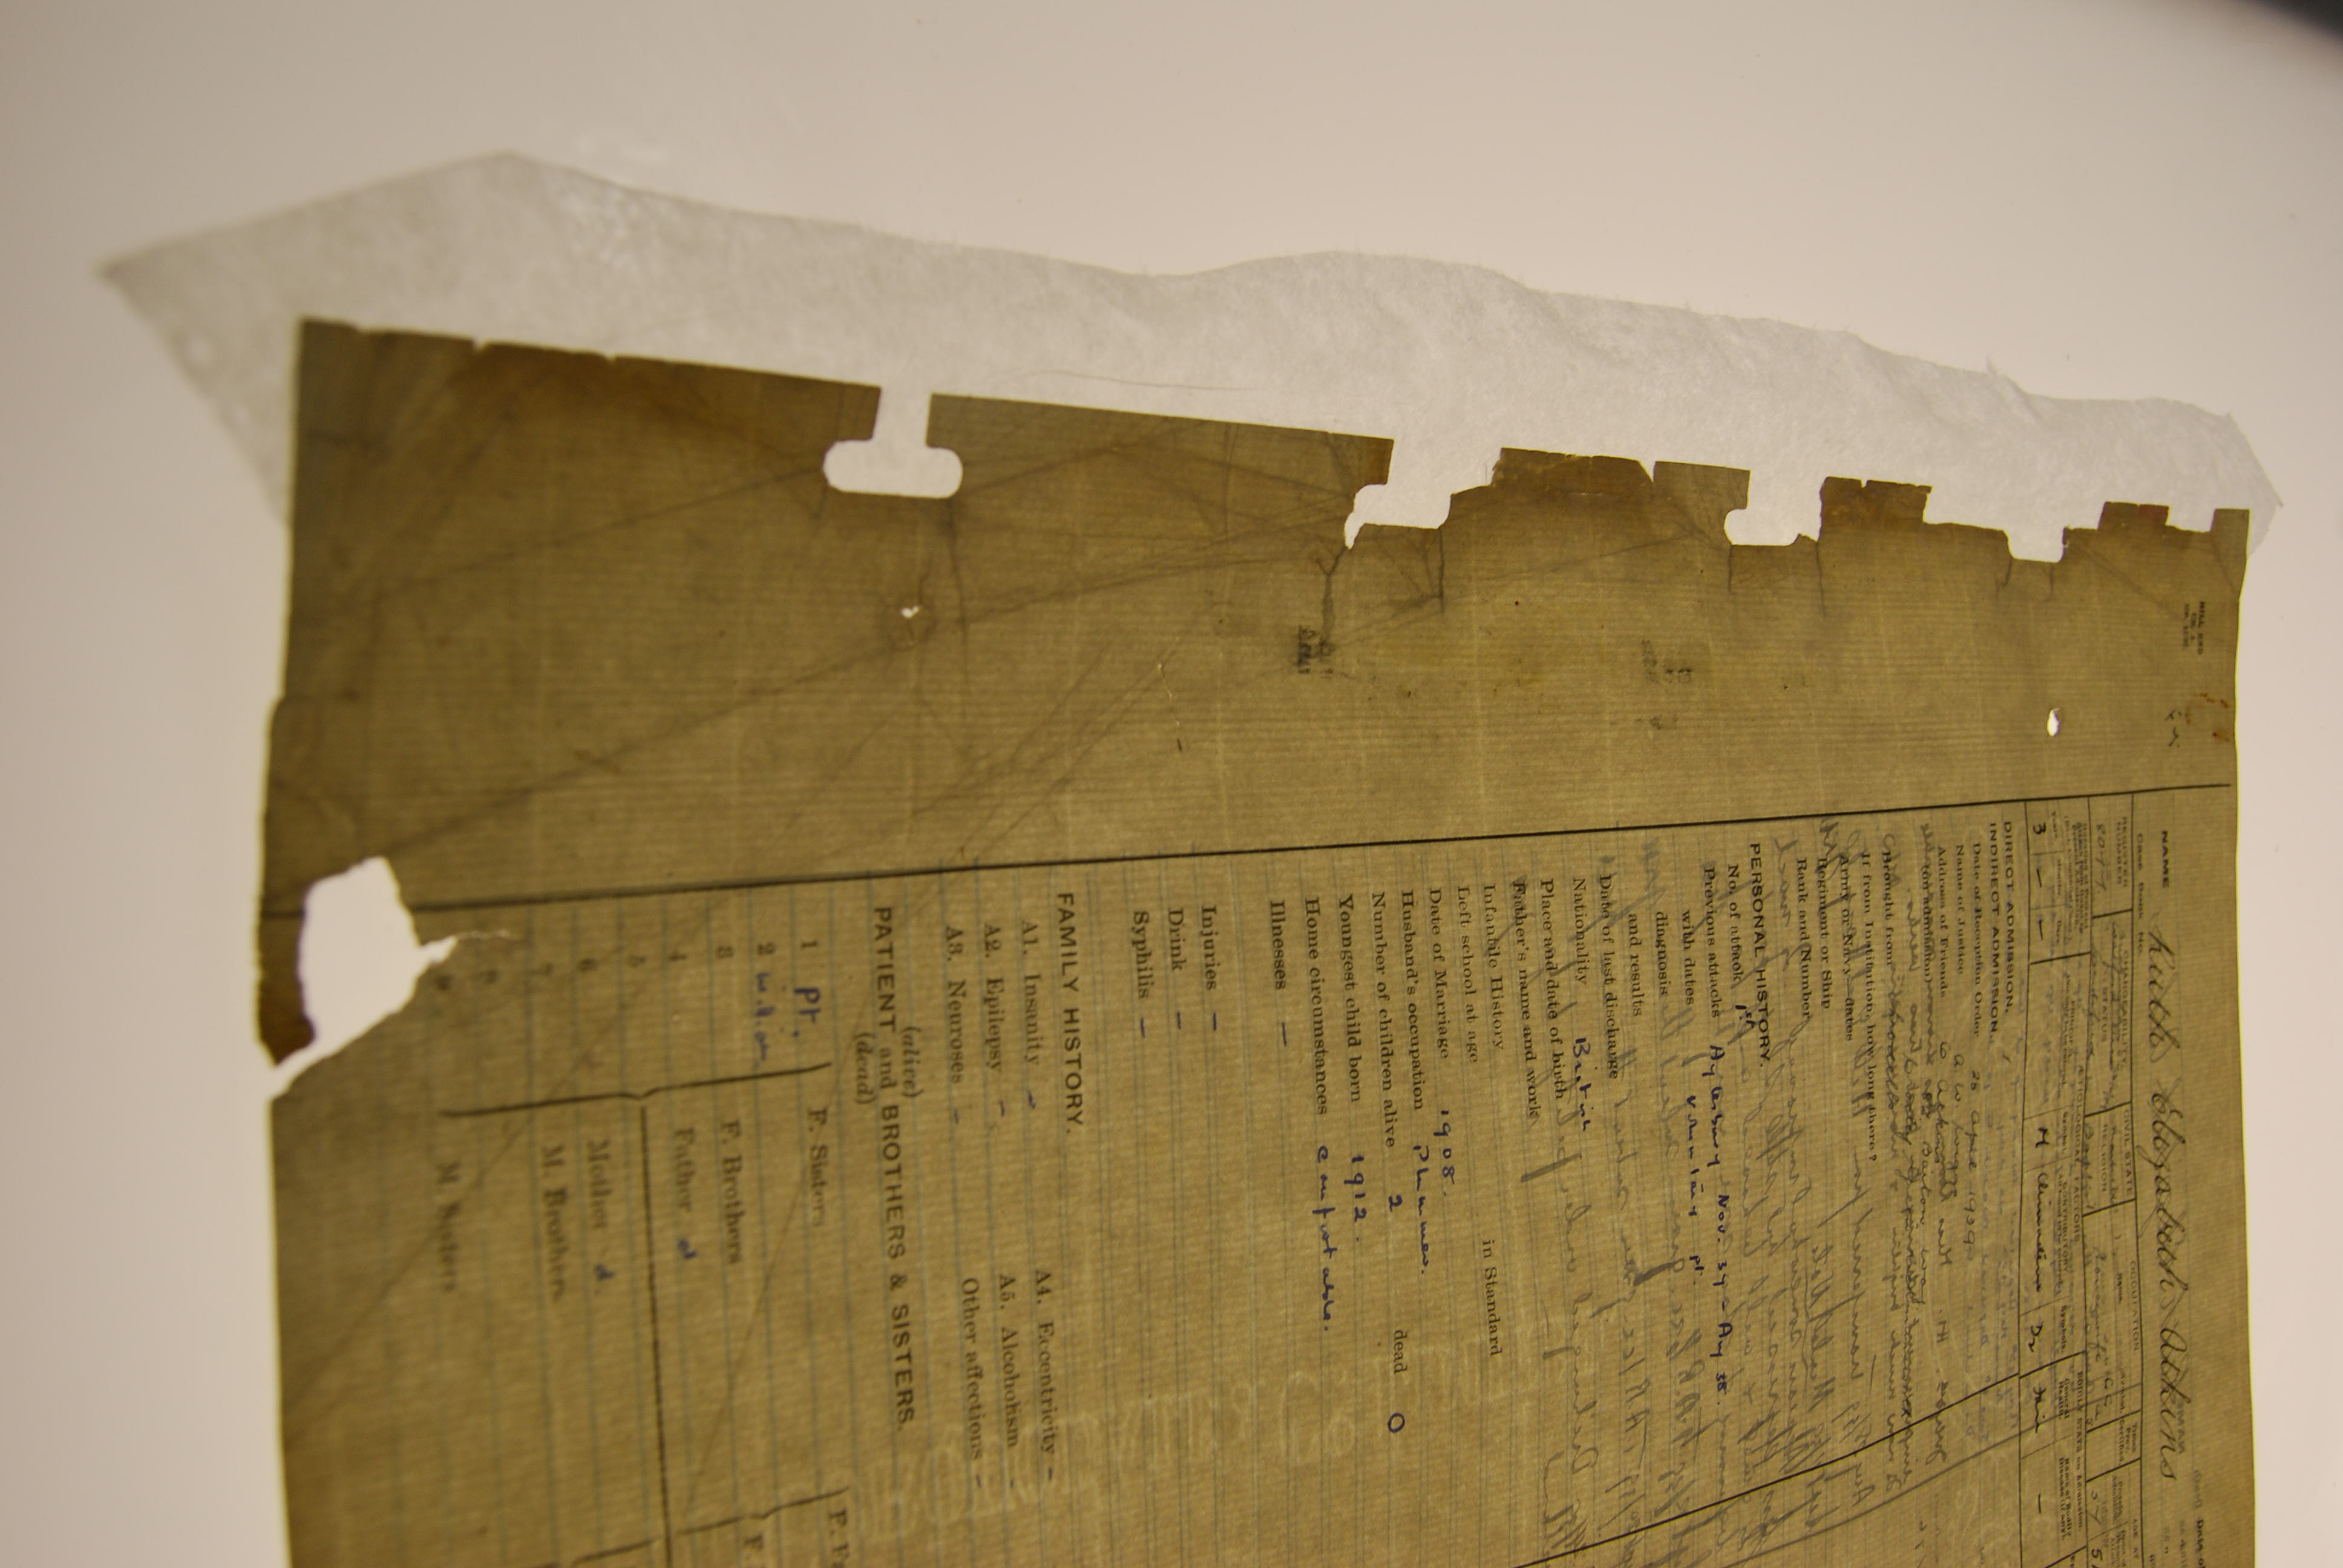
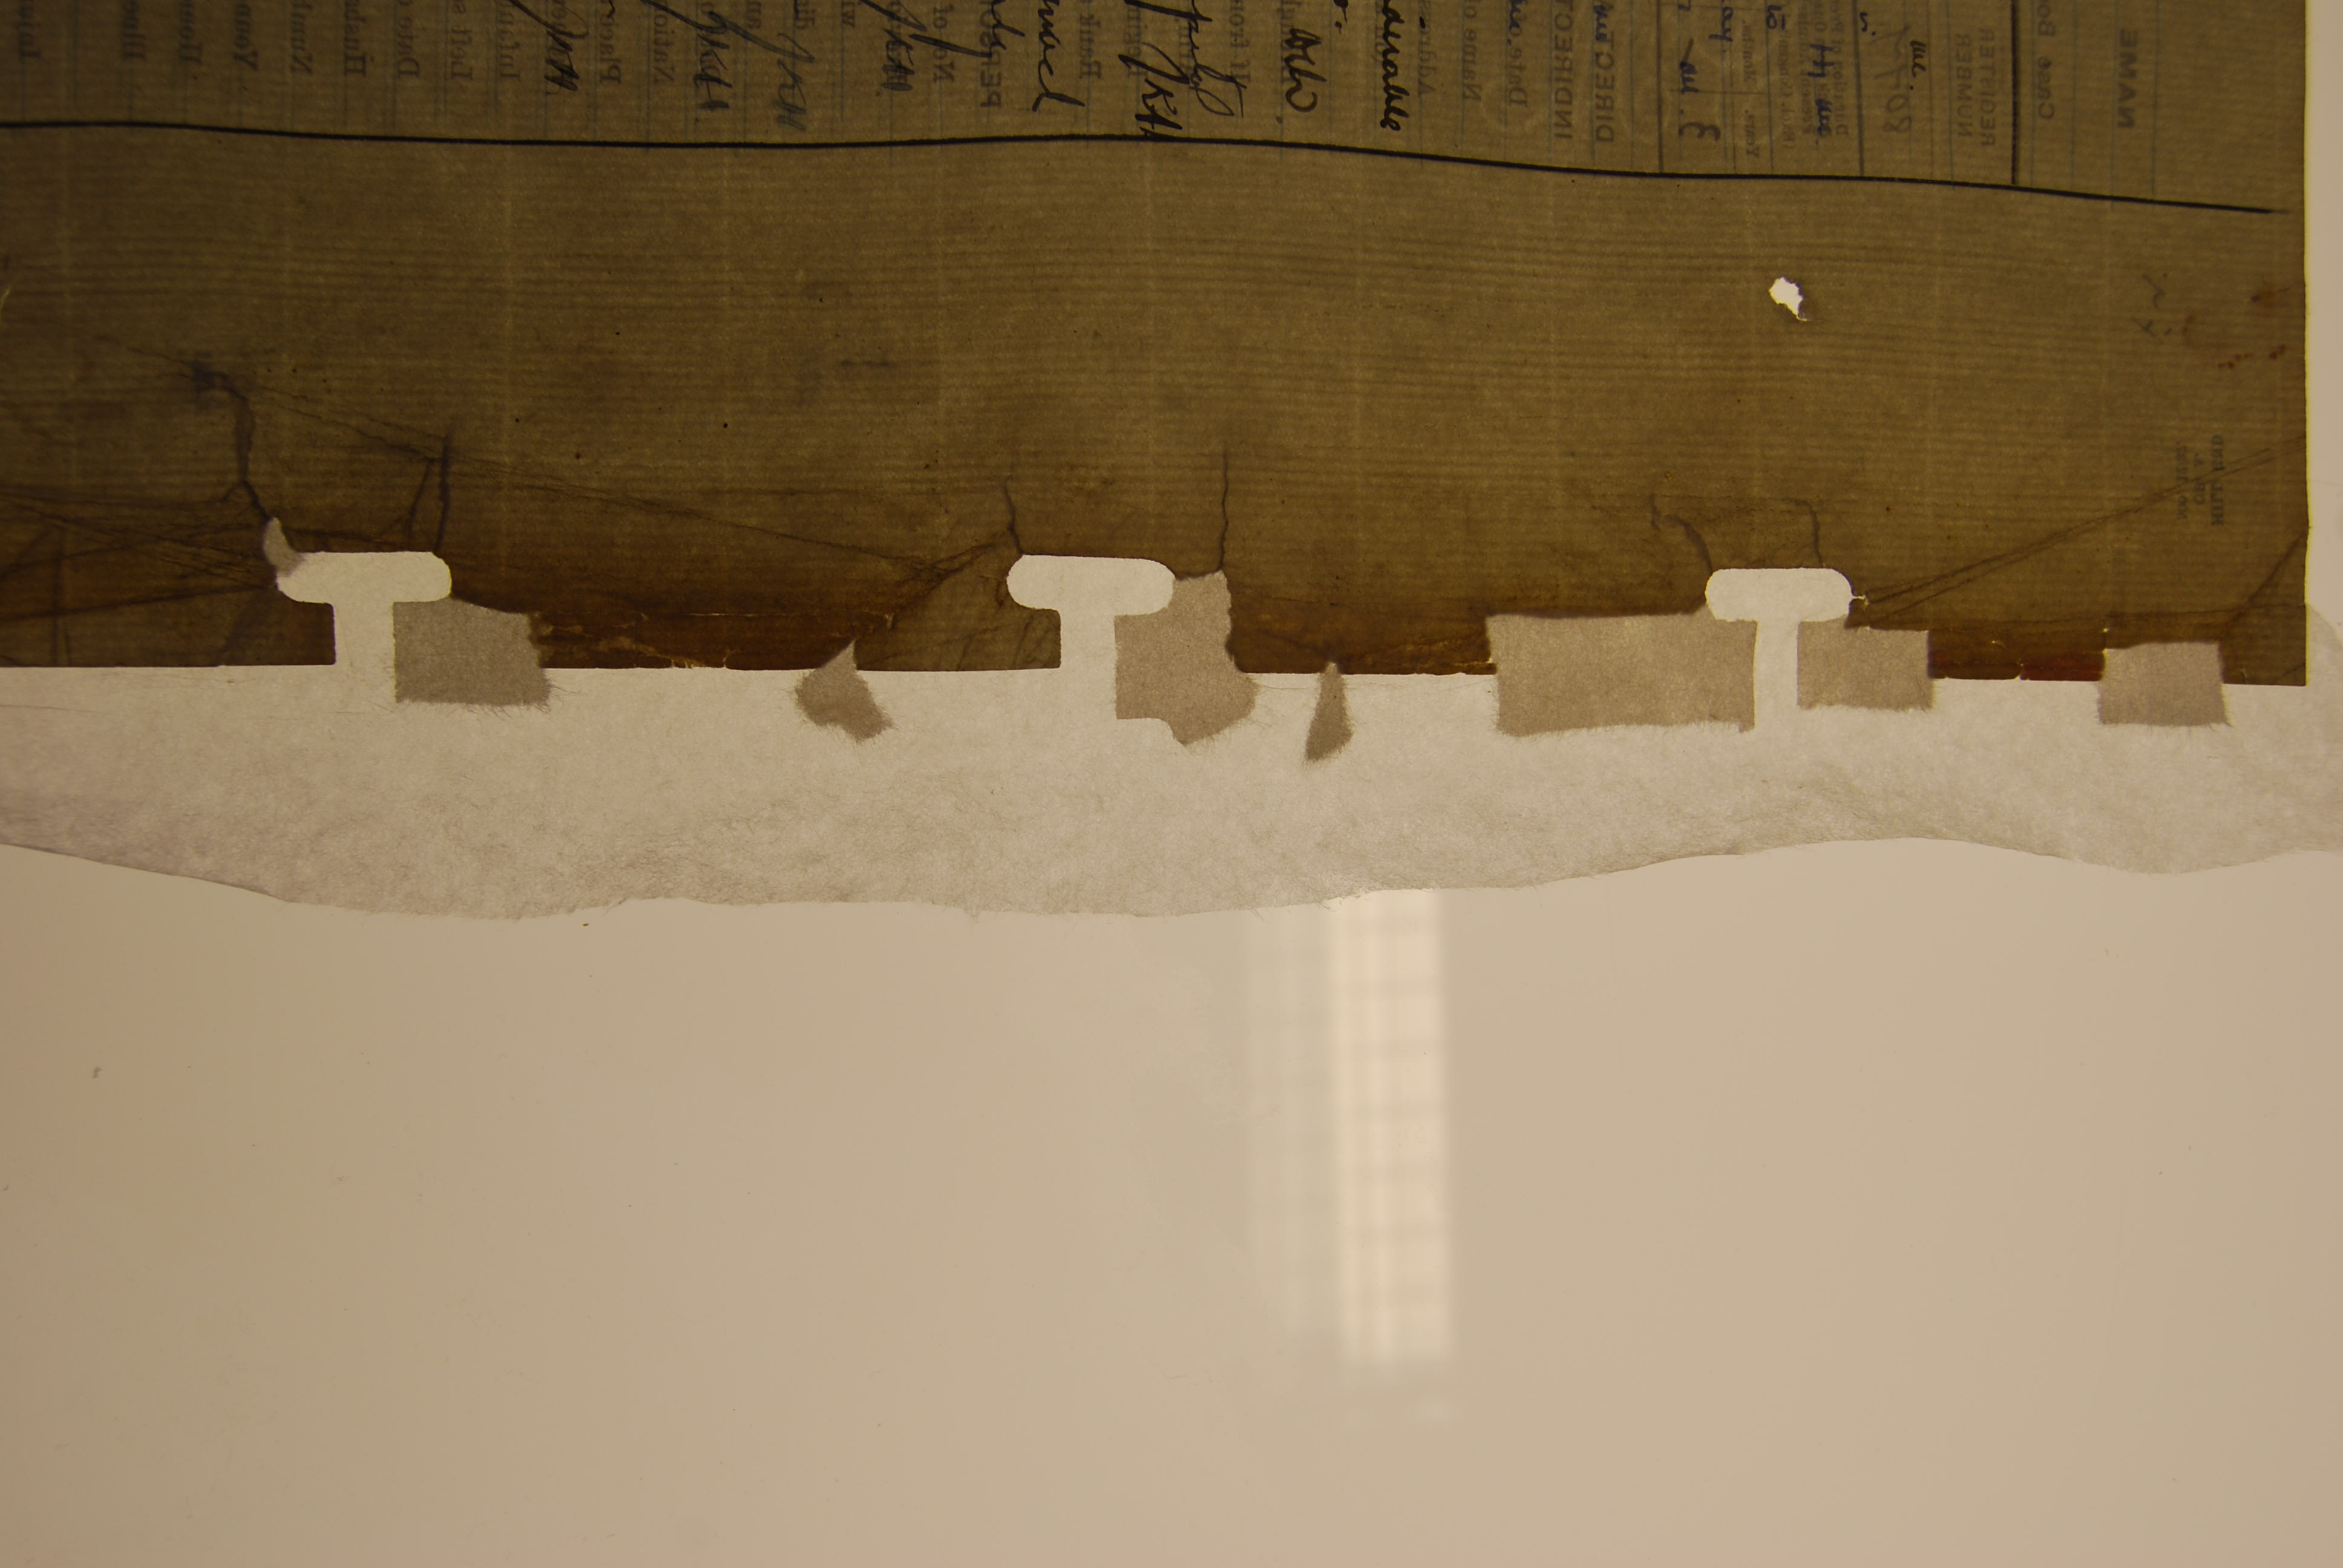
Infilling with Japanese paper
The fourth stage of repair was to infill any missing areas with Japanese paper and support tears with spider tissue. This was the longest stage of repair which required a lot of patience and concentration.
The majority of the documents needed paper repair. Exceptions were made to smaller items that had been protected by larger ones within the pile.
Each document was repaired in number order to save any confusion. Once it had been completed the document was flattened between weights and trimmed once completely dried.
Damage that was most common appeared along the left hand edge of the documents where the Kalamazoos had been punched into the side of the paper. These sections were particularly vulnerable to tears and folds which in turn created large missing areas.
This particular repair took time. However, by punching Kalamazoo holes in the repair paper, it was easy to recreate the missing area.
13 weeks to complete
It took a total of 13 weeks to complete the paper repairs. The number of completed documents varied from week to week depending on their condition. Some documents had small tears around the edges only taking minutes to repair while others had large missing areas with many tears which could take hours.
A total of 573 documents were repaired and put in the press to flatten.
A final storgage solution
The final stage of the project was to provide an adequate storage solution. It was decided that housing in archival manila folders containing approximately 20+ documents in each would be the best answer. Each one would be made to fit the dimensions of the pages and stack comfortably inside an archival box. This gave each bundle sufficient protection without taking up too much space on the shelf. It will also allow the viewer to handle each document much more easily without damaging the rest of the items.
A total of 22 folders were made and numbered on the outside for retrieval purposes.


Add your comment about this page
Excellent Article, Do you scan all of the documents on to computer as well? I think Haley has explained immaculately the details of keeping hold of some of the most important archives in the county. well done!